Adding a teeter-totter to an existing swingset changes the play dynamic considerably. Children get cooperative motion they cannot replicate on swings alone, and the equipment footprint stays compact. The catch is that a teeter-totter introduces lateral and vertical forces the original frame may not have been designed for, so the attachment process matters as much as the product selection. This guide walks through site assessment, hardware choices, installation steps, and the ongoing checks that keep the setup safe season after season.
What to inspect before you attach anything
A teeter-totter amplifies every weakness in the host structure. Before ordering hardware, spend twenty minutes with a flashlight and a socket wrench going over the swingset frame.
Start at the joints. Rust at bolt holes weakens metal tubing faster than surface corrosion elsewhere, and hairline cracks in welded corners can open under repeated rocking loads. On wooden frames, probe the grain around lag bolts with an awl; soft spots indicate rot that may not be visible on the surface. Tighten every fastener you can reach and note any that spin freely—stripped threads mean the bolt is no longer doing its job.
Check the manufacturer’s load rating next. Most residential swingsets list a static weight capacity, but a teeter-totter adds dynamic force when children push off the ground. A conservative rule is to treat the teeter-totter’s user weight as 1.5 times the static load for frame-stress purposes. If the numbers are borderline, reinforce the frame or choose a lighter add-on.
Ground anchors deserve the same scrutiny. Auger-style anchors should sit at least eighteen inches deep in compacted soil; anything shallower can pull out when the swingset rocks. Concrete footings are more reliable but harder to relocate if you change your mind later.
Finally, measure the clearance envelope. A teeter-totter’s seats sweep an arc that extends beyond the pivot point, and children’s legs swing outward at the bottom of each stroke. The Consumer Product Safety Commission recommends a use zone extending six feet from the outermost moving part in every direction. Mark that perimeter with stakes before you commit to a position.
| Inspection point | What to look for | Action if failed |
|---|---|---|
| Frame joints | Rust, cracks, stripped threads | Replace hardware or reinforce joint |
| Wood members | Soft grain, visible rot, deep splits | Replace member before installation |
| Load rating | Static capacity below 1.5× user weight | Reinforce frame or select lighter add-on |
| Ground anchors | Depth under 18 inches, loose fit | Re-drive or pour concrete footings |
| Clearance zone | Obstacles within six feet of seat arc | Relocate swingset or choose different attachment point |
Matching the teeter-totter to the swingset
Compatibility is not just about bolt patterns. The add-on’s pivot height, seat arc, and weight distribution all interact with the host frame’s geometry.
Pivot height determines the maximum fall distance. Residential standards in North America cap this at about 60 centimeters for equipment intended for children under five; commercial playground standards under ASTM F1487 allow slightly more but require deeper impact-attenuating surfacing. If your swingset’s crossbar sits high, a spring-base teeter-totter mounted at ground level may be safer than a beam-style unit hung from the bar.
Seat arc matters for clearance. A longer beam gives a gentler ride but sweeps a wider circle. Measure the available space under and around the swingset before settling on a beam length.
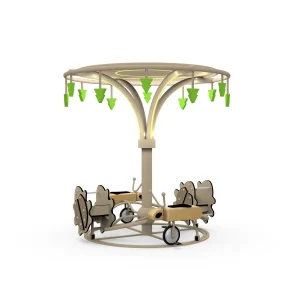
Material durability separates equipment that lasts two seasons from equipment that lasts ten. Powder-coated steel resists corrosion better than painted steel, and UV-stabilized polyethylene holds color longer than standard HDPE. Wooden beams need annual sealing in wet climates. The Multi-Person Outdoor Playground Seesaw from Suzhou LvDong Amusement Equipment uses a spring-assisted base and a galvanized steel frame rated to EN 1176 and GB/T34272-2017, which covers both structural load and entrapment hazards. That combination handles the lateral forces a multi-rider teeter-totter generates without transferring excessive stress to the host frame.
Age-appropriate design is more than a marketing label. Seats with back support and grab handles suit children under six; older children often prefer flat saddle seats that allow more freedom of movement. Check the manufacturer’s stated age range and compare it to the children who will actually use the equipment.
Step-by-step attachment process
Gather tools before you start: socket set, adjustable wrench, torque wrench if the manufacturer specifies fastener torque, tape measure, spirit level, and safety glasses. Lay out all hardware and cross-reference it against the parts list. Missing a single lock washer can mean a loose joint within weeks.
Position the teeter-totter base or mounting brackets first. If the design calls for ground-mounted posts, dig holes to the specified depth and set the posts in concrete, then wait at least 24 hours for the concrete to cure before attaching the beam. If the design mounts to the swingset frame, clamp the brackets in place temporarily and check alignment before drilling any new holes.
Attach the beam or pivot assembly to the brackets. Insert bolts from the inside out so the nut faces outward—this makes future inspections easier and keeps bolt heads away from pinch points. Thread nuts on hand-tight, then snug them in a star pattern to distribute clamping force evenly.
Level the beam with a spirit level resting on the pivot point. Shim the base or adjust bracket height until the bubble centers. An unlevel teeter-totter wears unevenly and can throw lighter children off balance.
Torque all fasteners to specification. Over-tightening crushes lock washers and can crack plastic bushings; under-tightening allows movement that enlarges bolt holes over time. If no torque value is given, tighten until the lock washer is fully compressed, then stop.
Install any caps, plugs, or guards that cover bolt ends and open tubes. These parts prevent finger entrapment and keep debris out of hollow members.
Post-installation checks and ground anchoring
Walk around the completed assembly and push on every joint. Nothing should flex more than a few millimeters. Sit on each seat and bounce gently; listen for creaks or clicks that indicate loose hardware.
Verify the ground anchors again. The added weight of the teeter-totter shifts the swingset’s center of gravity, and rocking motion can work shallow anchors loose over a single play session. If the frame lifts at all when you push down hard on one end of the teeter-totter, the anchors need to go deeper or be replaced with a heavier-duty design.
Check the surfacing depth. Impact-attenuating material compresses over time, and installation foot traffic compacts it further. Rake the material back into the use zone and top it up to at least nine inches of loose-fill wood fiber or six inches of engineered wood fiber. Rubber tiles or poured-in-place rubber should meet ASTM F1292 for the critical fall height of your equipment.
Mark the inspection date on a tag attached to the frame. This simple step creates an audit trail and reminds you when the next check is due.
Keeping the swingset teeter-totter safe over time
Monthly visual inspections catch problems before they become hazards. Look for loose bolts, cracked welds, splintered wood, and worn pivot bushings. Tighten or replace anything that fails the wiggle test.
Quarterly, apply lubricant to pivot points and spring mechanisms. Dry pivots squeak and wear faster; a few drops of silicone-based lubricant restore smooth motion and extend bushing life. Avoid petroleum-based oils on plastic components—they can degrade certain polymers.
Annually, strip and reseal wooden members if you live in a climate with freeze-thaw cycles or heavy rain. Metal frames benefit from a fresh coat of rust-inhibiting primer on any scratched or chipped areas. Replace any hardware that shows significant corrosion, even if it still feels tight.
Keep a small stock of replacement bolts, nuts, and bushings on hand. Manufacturers sometimes discontinue parts, and waiting weeks for a specialty fastener means weeks of equipment downtime.
Suzhou LvDong Amusement Equipment maintains parts inventories for its product lines and offers installation support through its after-sales team. If your project involves multiple pieces of unpowered play equipment or a full playground build-out, that kind of supply-chain continuity simplifies long-term maintenance planning.
Frequently asked questions
What age range suits most swingset teeter-totter add-ons?
Manufacturers typically rate residential teeter-totters for children aged three to ten, but the real constraint is the user’s ability to brace with their legs and hold the grab handles. A child who cannot touch the ground from the low seat position lacks the control to stop the motion safely. Check the seat height against your youngest intended user before purchasing.
Do I need special tools for the installation?
Standard socket wrenches and a tape measure handle most residential kits. Commercial-grade equipment sometimes requires a torque wrench to meet specified fastener tension. The manufacturer’s instruction sheet lists any specialty tools; read it before you start so you are not hunting for a metric socket mid-installation.
How do I protect the equipment from weather damage?
Powder-coated steel and UV-stabilized plastic resist the elements well on their own. Wooden components need a water-repellent preservative applied every one to two years, depending on exposure. Covering the equipment during extended off-season periods reduces UV degradation but is not strictly necessary if the materials are rated for outdoor use.
What ground surface works best under a teeter-totter?
Loose-fill materials like engineered wood fiber, rubber mulch, or pea gravel provide good impact attenuation at lower cost. Poured-in-place rubber or rubber tiles offer a firmer surface that stays in place but cost more upfront. Whichever you choose, verify that the depth or thickness meets ASTM F1292 for the equipment’s critical fall height. Grass and packed dirt do not qualify as safety surfacing.
How long does installation typically take?
A ground-mounted spring teeter-totter with concrete footings requires two sessions: one to set the posts and pour concrete, another the next day to attach the beam and hardware. Expect two to three hours of active work spread over those sessions. Frame-mounted add-ons that bolt directly to an existing swingset can be finished in one to two hours if the frame is in good condition and all hardware is present.
To discuss specifications for a swingset teeter-totter project or request a quote on commercial-grade playground equipment, contact Suzhou LvDong Amusement Equipment at [email protected] or via WhatsApp at +8613915684545.
If you’re interested, check out these related articles:
Evaluate Commercial Playground Manufacturers 8 Critical Selection Factors
7 Mistakes to Avoid Buying Commercial Playground Equipment
Choosing a Soft Play Specialist Indoor Playground Equipment Expertise
Evaluate Playground Equipment Samples Before Buying A Guide
Free 3D Design for Community Park Playground Equipment Solutions